

How to Test a Relay: A Complete Step-by-Step Guide by ODG
Understanding Why Relays Matter
When a device suddenly stops working, one of the most overlooked culprits is often the relay. This small yet powerful component acts as an electrically operated switch, controlling circuits with precision and safety. Whether you’re dealing with automotive systems, HVAC units, or industrial machines, knowing how to test a relay can save you both time and money.
At ODG, we understand the value of reliable components. Our extensive inventory and global customer base depend on the consistent performance of parts like relays. That’s why testing them properly isn’t just about repair—it’s about ensuring long-term reliability and efficiency.
The Tools You Need Before You Begin
Before diving into the testing process, gather the following equipment:
-
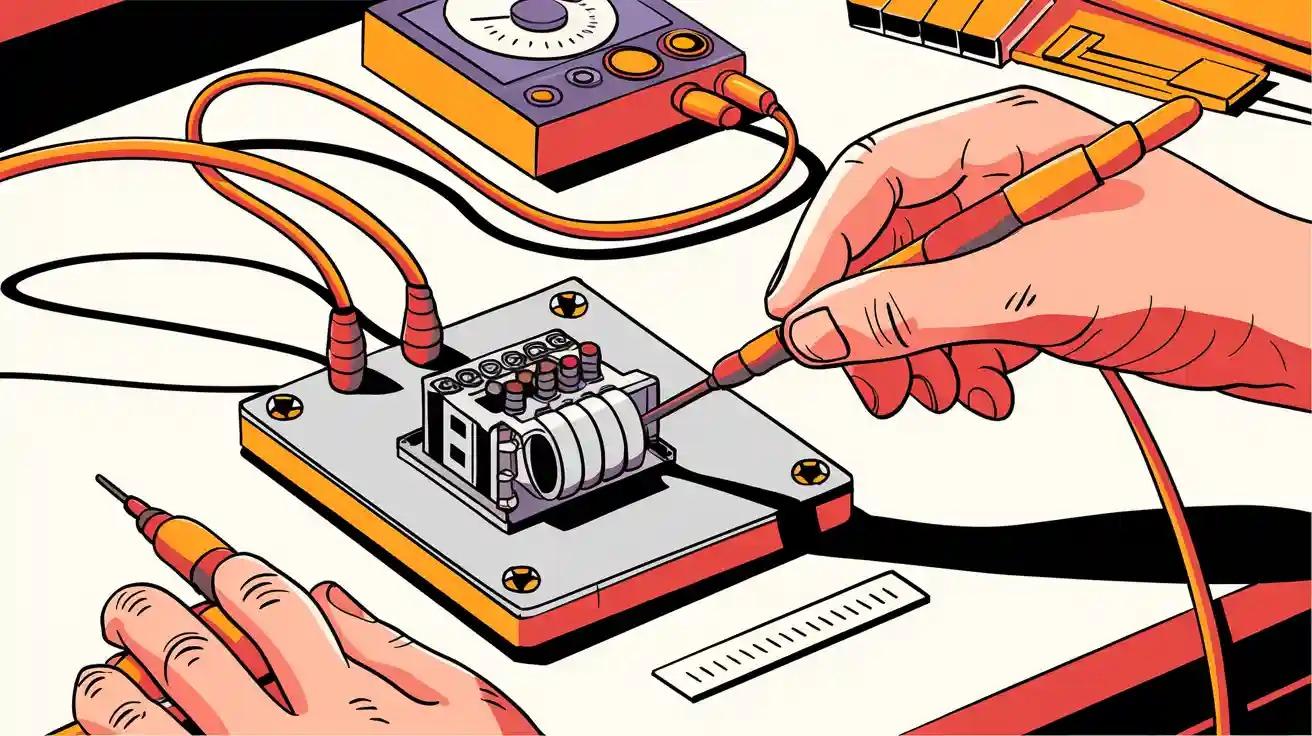
A multimeter – to measure voltage, resistance, and continuity.
-
Jumper wires – for connecting the relay to a power source safely.
-
A power supply or car battery (12V) – to energize the relay coil.
-
A wiring diagram or relay pin layout – usually printed on the relay casing.
These tools are essential for ensuring accurate results. A systematic approach minimizes guesswork and helps you pinpoint the problem with confidence.
Step 1: Start with a Visual Inspection
The first step in learning how to test a relay is often the simplest—look closely. Examine the relay casing for cracks, burn marks, or corrosion on the pins. Any visible damage could indicate internal failure or short circuits.
Relays are built to withstand electrical stress, but over time, heat and vibration can weaken the contacts. Identifying these signs early can prevent unnecessary replacements and costly downtime.
Step 2: Identify the Pin Layout
Every relay has a specific configuration of pins—typically four or five. Understanding this layout is essential before testing.
Most relays include:
-
Two coil terminals (often labeled 85 and 86) that energize the relay.
-
A common terminal (30) connected to the load.
-
A normally open (87) and normally closed (87a) terminal that switch positions when the relay is activated.
Refer to the diagram printed on the relay body. It’s your roadmap for understanding how current flows through the device and where to place your testing probes.
Step 3: Test the Relay Coil
Set your multimeter to the ohms (Ω) setting. Place one probe on each of the coil terminals (usually pins 85 and 86).
-
If the multimeter displays a reading between 50 and 200 ohms, the coil is functioning correctly.
-
If the display reads infinite resistance (OL), the coil is open and the relay is faulty.
-
If the reading is 0 ohms or near zero, the coil is shorted and must be replaced.
This step helps determine whether the relay can activate when voltage is applied.
Step 4: Energize the Relay
Using jumper wires, connect the coil terminals to a 12V DC power source—positive to pin 86 and negative to pin 85. You should hear a distinct click as the internal switch toggles positions.
That click is the sound of your relay working. If you don’t hear it, the coil might not be energizing, or internal contacts could be stuck.
Pro tip: Always double-check polarity and connections before powering up to avoid accidental short circuits.
Step 5: Check the Switching Function
Now that the relay is powered, it’s time to confirm if the contacts are working properly. With the relay energized, set your multimeter to continuity mode and test between:
-
Pin 30 and Pin 87 (Normally Open)
-
Pin 30 and Pin 87a (Normally Closed)
When the relay is not energized, there should be continuity between 30 and 87a. When it is energized, continuity should shift to 30 and 87.
If the relay doesn’t switch between these two states, the internal contacts are likely worn out or damaged. Replacing the relay is the safest option.
Step 6: Confirm Performance Under Load
A relay may appear functional when tested without a load but fail under actual working conditions. To confirm performance, connect the relay in a simple test circuit with a small light bulb or fan. When you apply voltage to the coil, the connected device should operate instantly.
This final step ensures the relay can handle current as intended—crucial for safety and reliability in high-demand environments.
Common Reasons Relays Fail
Understanding why relays fail helps prevent future issues. Some typical causes include:
-
Overvoltage or undervoltage stressing the coil.
-
Excessive heat from high current loads.
-
Moisture or corrosion compromising contacts.
-
Mechanical wear from frequent switching cycles.
Choosing high-quality relays, like those supplied by ODG, reduces the likelihood of these failures. Our components undergo strict quality assurance (QA) and quality control (QC) processes to ensure they meet global standards such as AS9120B, ISO9001, and ISO14001.
Why ODG Stands Out
Testing a relay is about ensuring trust—and trust starts with quality components. At ODG, we don’t just distribute parts; we deliver reliability. Our warehouses feature millions of components ready to support industries ranging from aerospace to automotive manufacturing.
With experienced engineers, rigorous testing standards, and membership in ERAI, ODG ensures that every component you receive meets the highest benchmarks of performance. Our customer-focused approach allows us to work closely with OEMs to create tailored solutions that enhance efficiency and reduce operational risk.
When your equipment depends on precision, ODG’s parts and expertise make all the difference.
Bringing It All Together
Mastering how to test a relay isn’t just about fixing a faulty device—it’s about understanding the flow of electricity, the role of reliability, and the value of precision engineering. Every successful test gives you confidence that your systems are operating safely and efficiently.
As industries evolve and technology advances, the need for reliable components remains constant. By combining hands-on knowledge with trusted suppliers like ODG, you ensure every system performs exactly as it should.
Where precision meets performance, excellence begins. The next time your device stops working, you’ll know exactly where to start—and how to make it right.
Follow ODG:
YouTube: https://www.youtube.com/@Origin_Data Facebook: https://www.facebook.com/OriginDataGlobalLimited Twitter: https://twitter.com/Origin_IC Tiktok:
https://www.tiktok.com/@origin_data Szxlxc:
https://www.szxlxc.com